

How to set up your iPhone 6s and iPhone 6s Plus
http://xpeco.blogspot.com/2016/03/how-to-set-up-your-iphone-6s-and-iphone.html
Now that you've picked up your very own iPhone 6s or 6s Plus, here's how to set it up.
Whether you've gotten your new iPhone from an Apple Store, other retail store, or shipped to your home, once you unbox it you'll need to set it up in order to start having fun with your new device. So we've put together a step-by-step guide to get you going.
[next]
1. Should I set up from scratch or restore?
You have three choices during setup: Start from scratch, restore from an iCloud or iTunes backup of a previous iPhone, or use the Move to iOS app to restore your information from an Android device.
When to start from scratch
There are a couple of reasons you might want to have a fresh install on your new iPhone. Those who have never owned a smartphone before are the chief beneficiaries of this install process—they have no data to restore from, after all—but starting from scratch can be useful elsewhere, too.
For example, when you buy an iPhone from the Apple Store, you're given the option to set it up with a Specialist before you leave. Even if you have a backup waiting at home, if you really want to play with your new iPhone ASAP (or you want to make sure you can receive phone calls until you get home), you should absolutely set up your new device from scratch. Logging into iCloud during that fresh install will ensure you still have access to your address book, Messages, and passwords, but you won't have to wait for a full iCloud restore before you can access core features.
When you get back home, just go to Settings > General > Reset > Erase All Content and Settings, then set up your iPhone again from your backup of choice.
The other group I recommend starting from scratch to are the ones who want what's called a "clean install"—they may have a backup, but they want to reinstall all their apps and system settings because they feel their device has gotten slow or full of excess cruft. Because, as I mentioned above, your iCloud account syncs most of your vital information, you don't really need to restore from a bonafide backup—with a few exceptions:
- Health data requires an encrypted iTunes backup or iCloud backup before it can be restored to a new device.
- Apple Watch data is kept in an iPhone's backup.
When to restore from an iPhone backup or Android's Move to iOS
If you want to keep data that your iCloud doesn't sync or you want to move text messages and the like over from your Android phone, you'll want to stick with restoring from a backup.
If you purchased your phone at an Apple Store, you're given the option to set up while you're there: And if you're doing something complicated—switching from another platform, for example, or a feature phone—it might be helpful to have someone walk you through the ropes. But if you have an iCloud backup or an iTunes backup of a previous iPhone, it's better to set it up at home.
For one thing, if you have an iCloud backup, you won't be relying on the Apple Store's already strained Wi-Fi network to restore—and once you start restoring, you have to stay there until it finishes. (That can sometimes take up to an hour—and unless you love hanging out in an Apple Store for an hour...) iTunes backups also generally make more sense to restore when you get home, as they require your computer.
Start the setup process
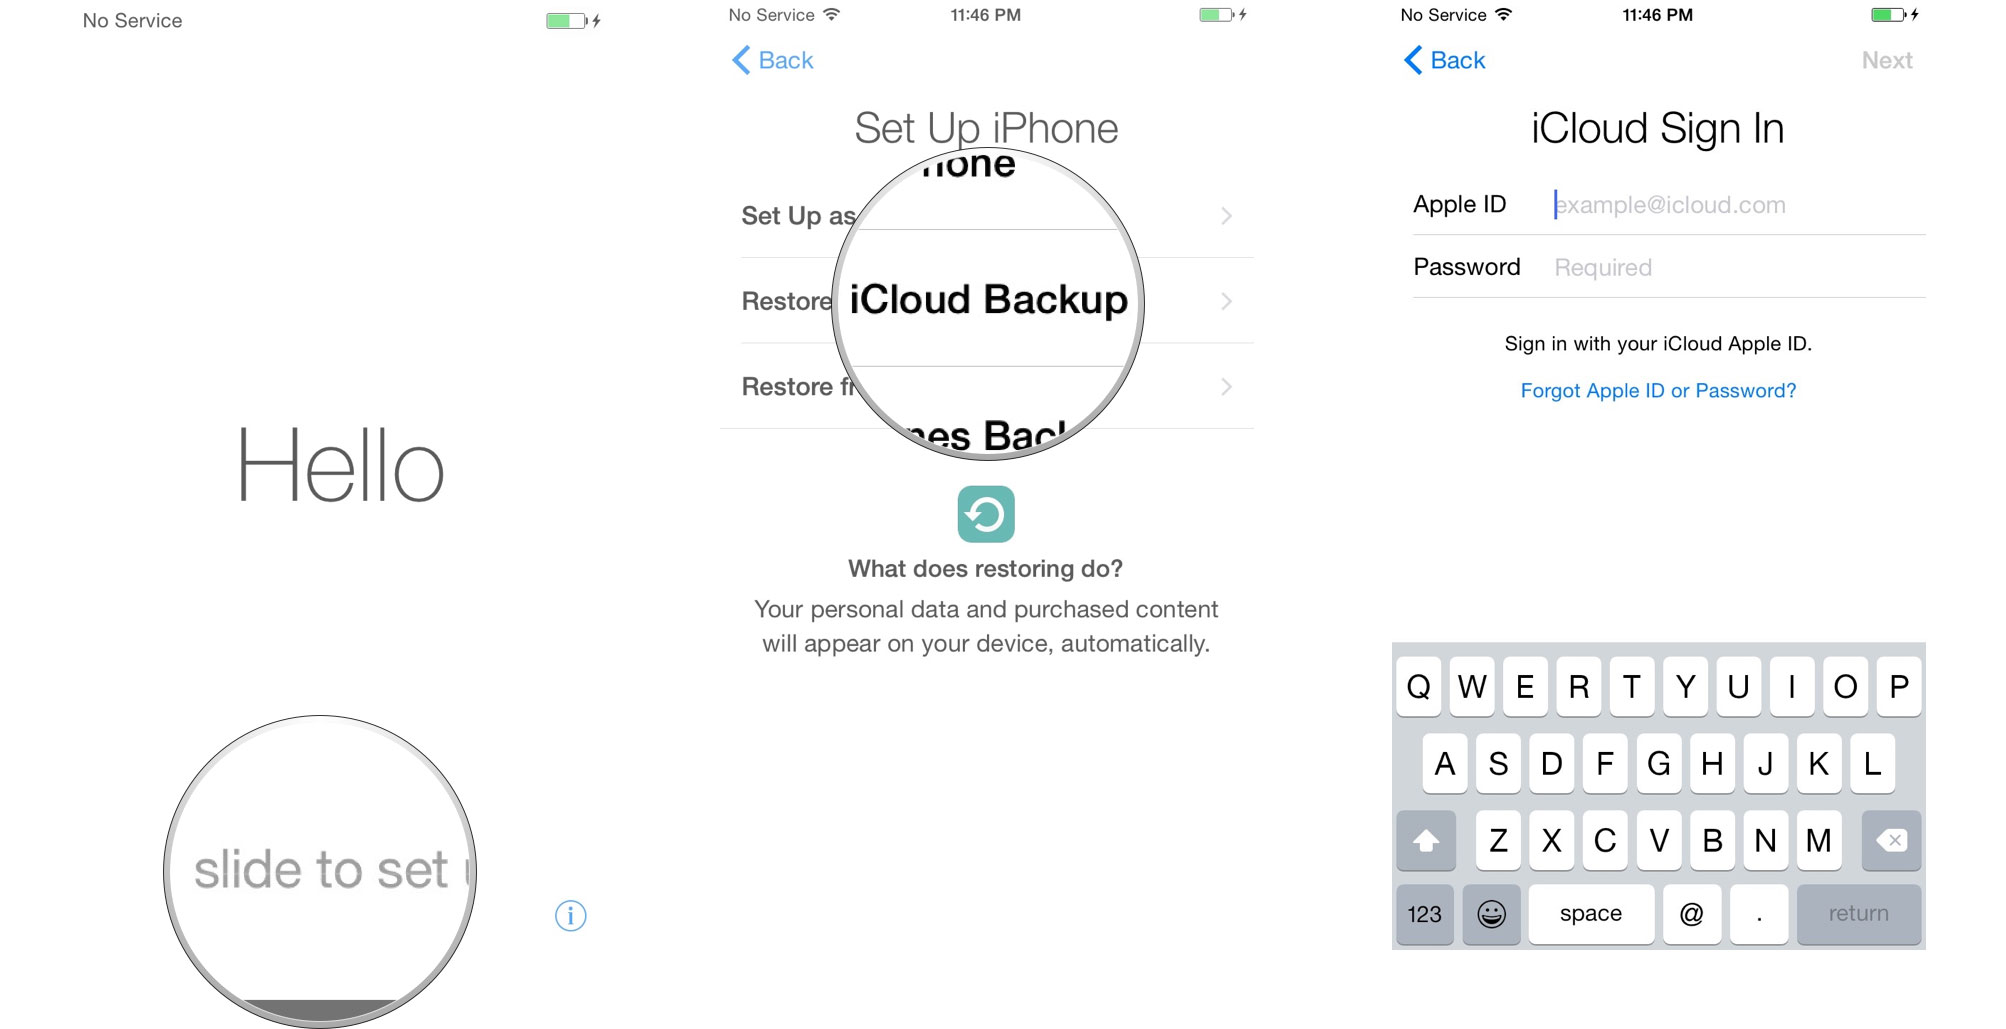
When you turn on your new iPhone, iPod touch, or iPad, you'll be greeted with a Lock screen that simply says "Hello" in many different languages. After your iPhone or iPad powers on, you'll see a welcome screen. Slide your finger across the bottom where it says slide to set up, then choose your language and country or region.
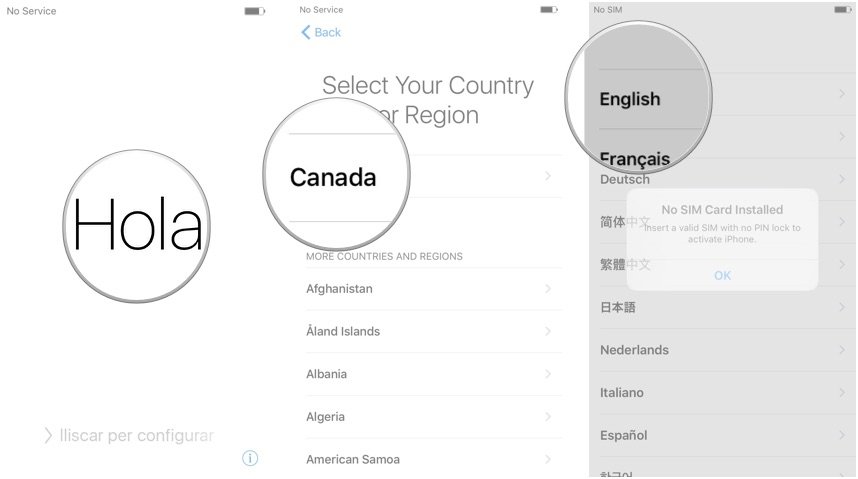
From here, you'll need to choose a Wi-Fi network and enter its password, if necessary; if you don't have access to Wi-Fi or no networks are found, you can choose Use Cellular instead.
From here, your iPhone should activate. If it doesn't and you receive an error, be sure you have a valid SIM card installed.
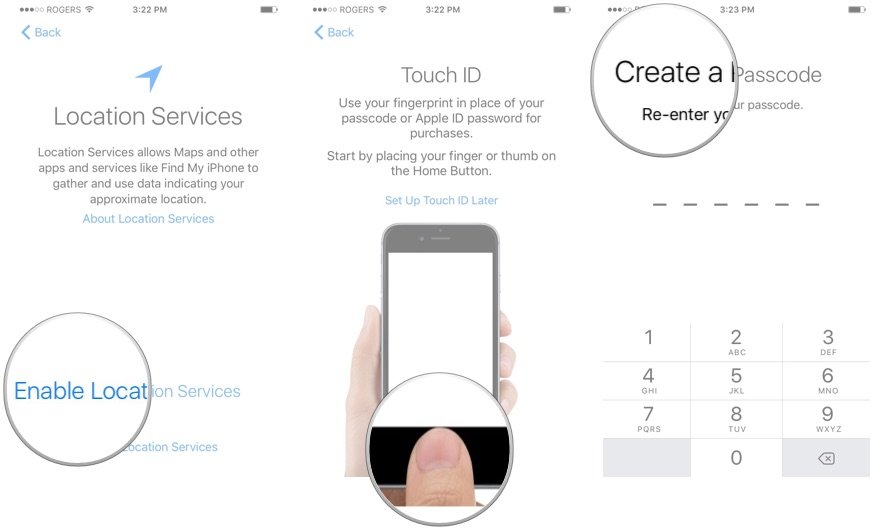
After activation, you're brought to the Location Services screen, where you can choose whether you'd like to have location services on by default. Make sure you read the description of what location services are before deciding whether or not you'd like to enable or disable them. (Keep in mind that certain apps like Maps need location services enabled to operate properly.)
From here, you'll want to set up your Touch ID fingerprint and a passcode. (You can skip this step by selecting Set Up Touch ID Later).
On the next screen, you're given the option to set up as a new device, restore from iCloud, restore from iTunes, or restore from Android.
From here, you can choose to either sign in with an existing iCloudApple ID or create a new, free one. Note: If you use two separate IDs for iCloud and iTunes, you can choose that option here under the login screen by tapping on Use different Apple IDs for iCloud and iTunes.
If you don't want to do either right now, or you don't have an Apple ID yet, you can tap on Skip This Step. (You can always go back and create one or sign in from the Settings app at any time.)

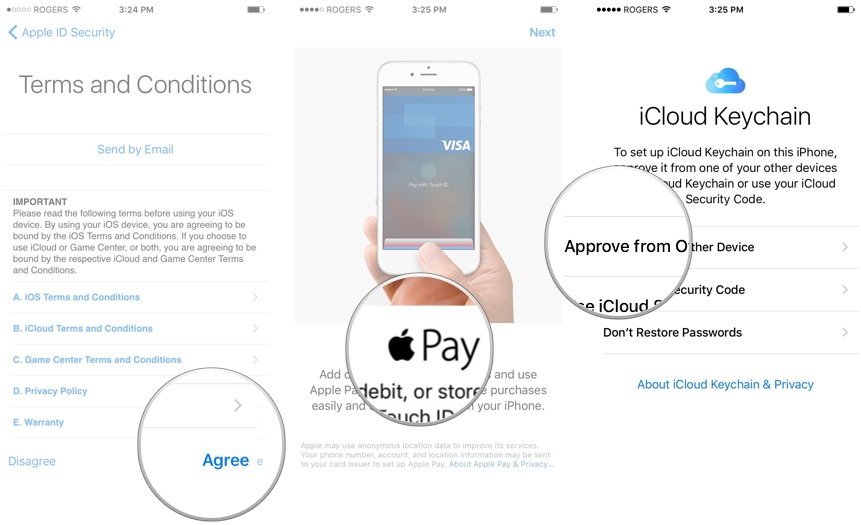
Agree to Apple's Terms and Conditions on the next screen. The following screen will ask you to confirm that you agree one more time.
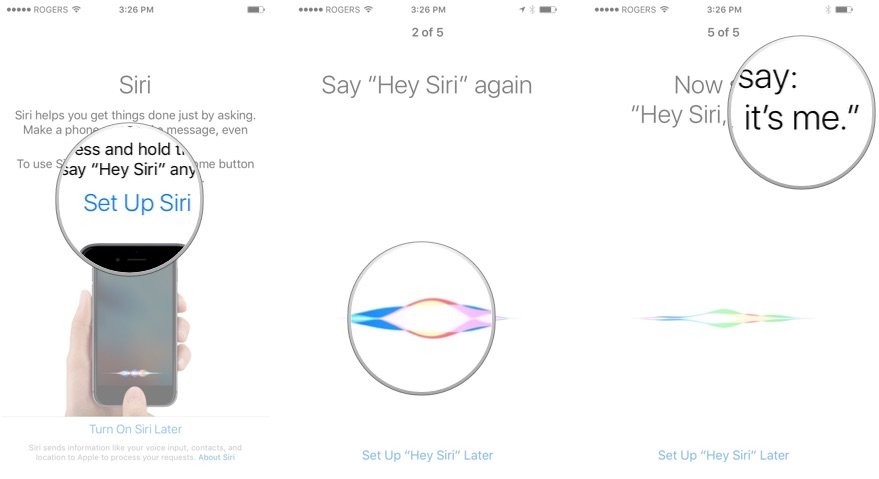
After doing so, you'll be asked to set up Apple Pay, Apple's Touch ID-based payment option; iCloud Keychain, which stores and syncs your passwords across all your devices; and Siri, Apple's voice-activated assistant.
You'll also be asked if you want to use "Hey Siri," which lets you automatically trigger Siri with the aforementioned catchphrase; if you do, your phone will walk you through calibrating Siri to your voice.
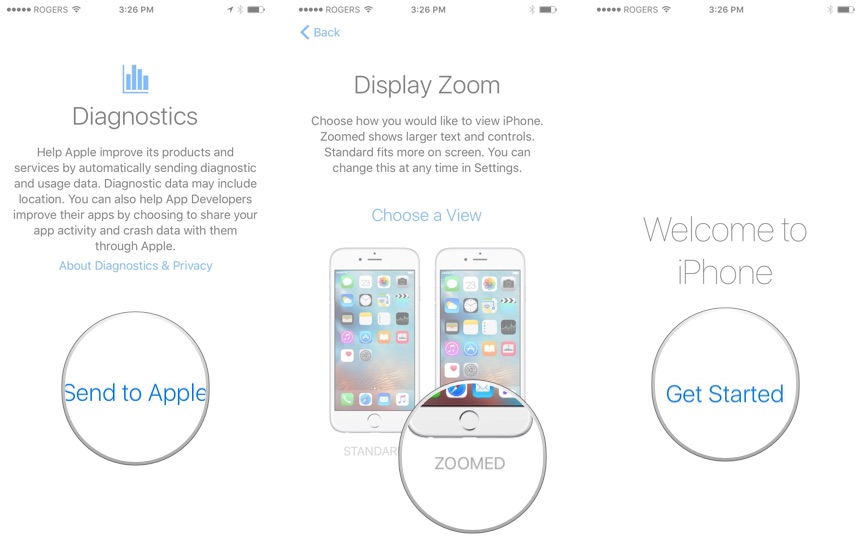
Finally, you'll be prompted about automatically sending anonymous diagnostics to Apple when apps crash or are otherwise sluggish, to better improve the system. If you'd rather not, just tap Don't Send. You'll also be offered the option to turn on Display Zoom, which makes apps and text a bit bigger to fill in the larger screen.
And with that, you're done with the initial setup process! (Though we recommend going through the Settings app to further tweak your iPhone to your liking.
[next]
Restore from an iCloud backup
If you use Apple's online service, iCloud, to back up your iPhone, then you can transfer all your data from your old device to your new one wirelessly. Depending on when your last backup was, however, you might want to manually trigger a backup before making the transfer. This ensures that everything is as up-to-date as possible.
- First, follow the instructions in step 1. After selecting Restore from iCloud backup, sign into your iCloud account. (Your Apple ID.)
- Tap Next.
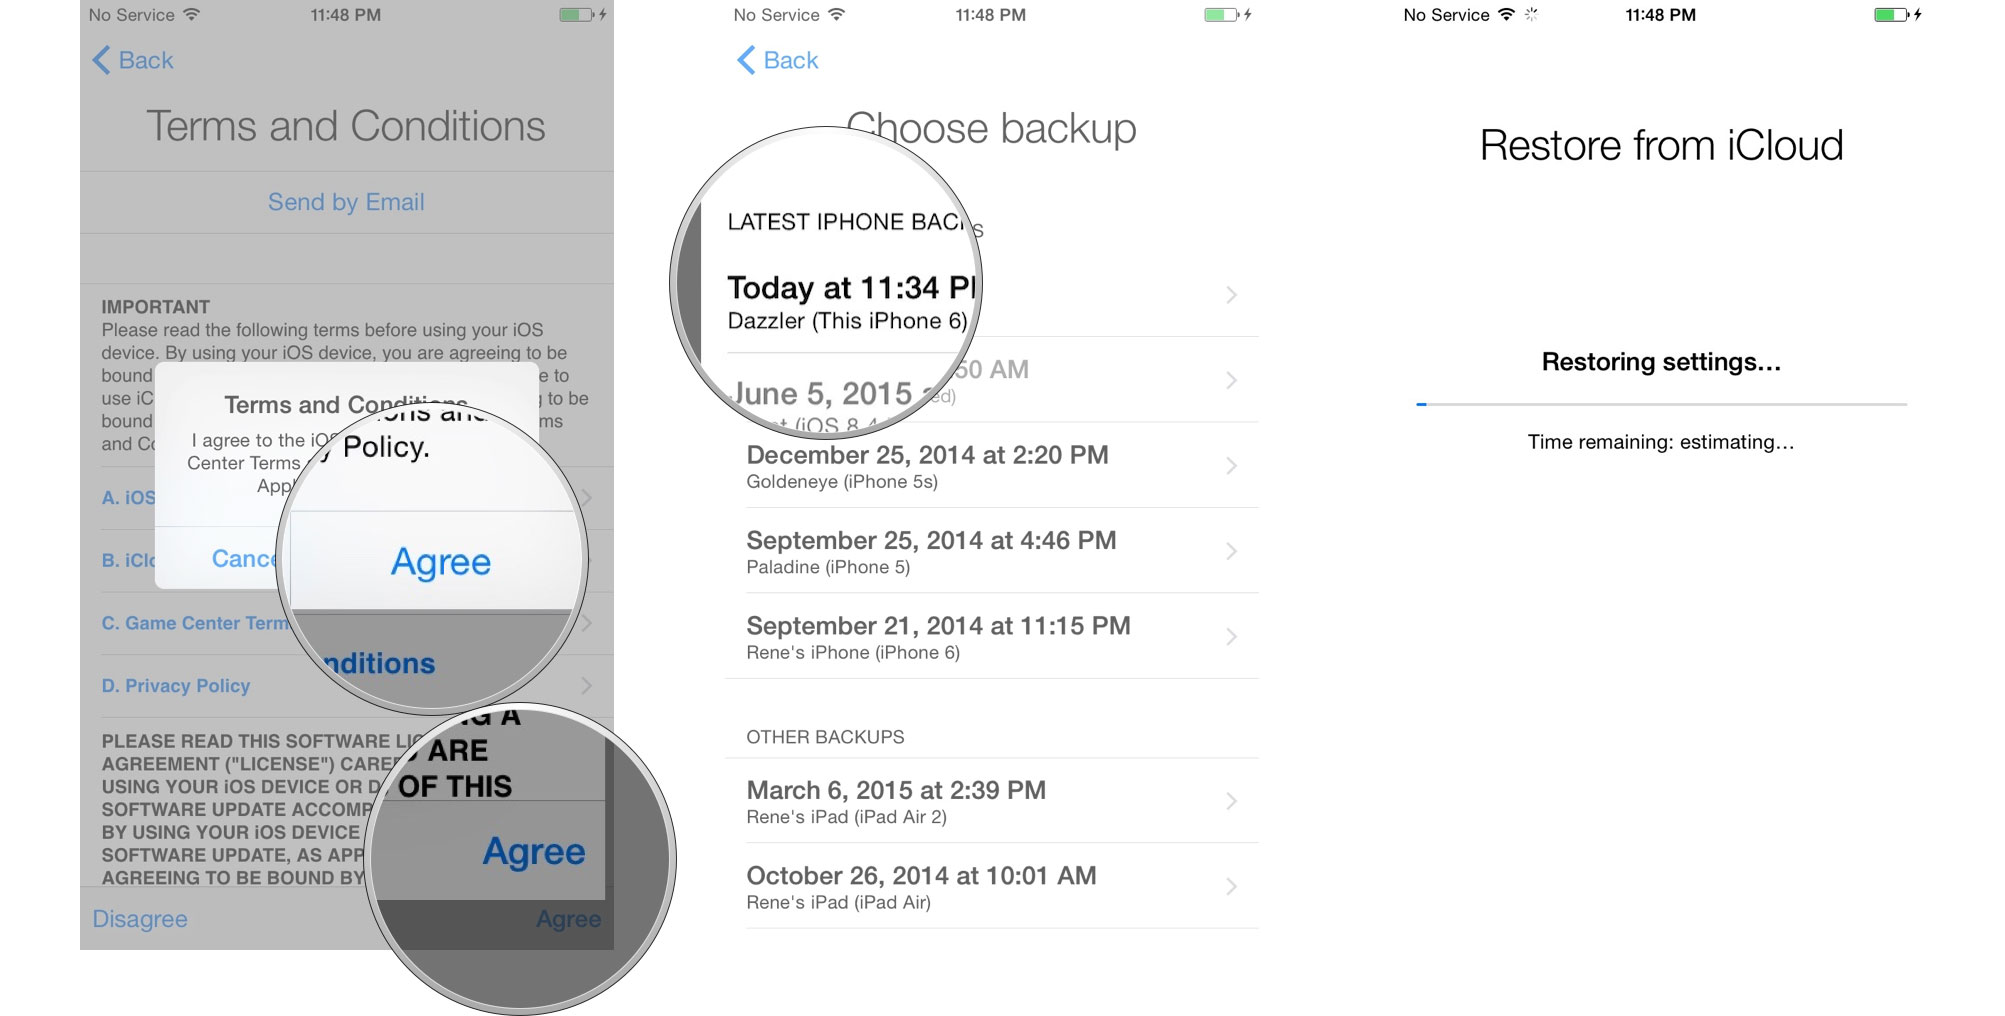
- Agree to the Terms and Conditions and Confirm.
- Choose your recent backup from the list.
- Enter your iCloud password when and if requested.
Depending on how much data you have to download, including music and apps, it might take a while for the transfer to complete. Your iPhone might feel warm for a while, due to the radios working and the Spotlight search system indexing. Stay on Wi-Fi as much as possible so that you can speed up the process.
[next]
Restore from an iTunes backup
If you use iTunes to back up your iPhone, you can transfer data to your new one using your USB to Lightning cable. Again, depending on when your last backup was, you might want to manually trigger a backup before making a transfer. That'll ensure everything is as up-to-date as possible.
- First, follow the instructions in step 1. After selecting Restore from iTunes backup, connect your new iPhone to your computer and open iTunes on your Mac or Windows PC.
- Select Restore from this backup.
- Choose your recent backup from the list.
- Enter your password if your backup was encrypted (recommended if you want to restore Health.app data).

Depending on how much data you have to download, including music and apps, it might take a while for the transfer to complete. Your iPhone might feel warm for a while, due to its radios working and the Spotlight search system indexing.
Keep your iPhone plugged into iTunes until the transfer is complete.
 Click on The Image & Start Earning !


