

How to use Apple Music on the Mac
http://xpeco.blogspot.com/2016/03/how-to-use-apple-music-on-mac.html
iTunes was originally a music player that could also rip CDs. Over time, Apple added the iTunes Music Store and the ability to sync music to the iPod. It was ported to Windows. The ability to play video and purchase movies and TV shows was added. Podcasts were added. Audiobooks. The ability to buy apps and sync with iPhones and iPads. iTunes Match. And, most recently, Apple Music, including Connect and Beats 1 radio. iTunes is a monster of an app because it has a monster of a job. Here's a quick tour!
How to create an iTunes account
If you don't have an Apple ID, you'll want to create one now. An Apple ID is what you'll use to not only buy music, movies, TV shows, and even iOS apps on your Mac, but download stuff you may have bought on your iPhone, iPod touch, or iPad. It ties everything together.
- Click on the Account button.
- Click on Create Account.

Agree to the Terms of Service and fill in the required information.
How to log in to iTunes
Once you have your Apple ID, or if you already had an Apple ID, login now. Logging into iTunes means you can buy music, movies, TV shows, and even iOS apps right from your Mac, and all of that content will stay associated with your account and be available to any other Apple devices you may own, including iPhone, iPad, or iPod touch.
- Click on the Account button.
- Enter your Apple ID username (typically an email address) and password.
- Click on Sign In.

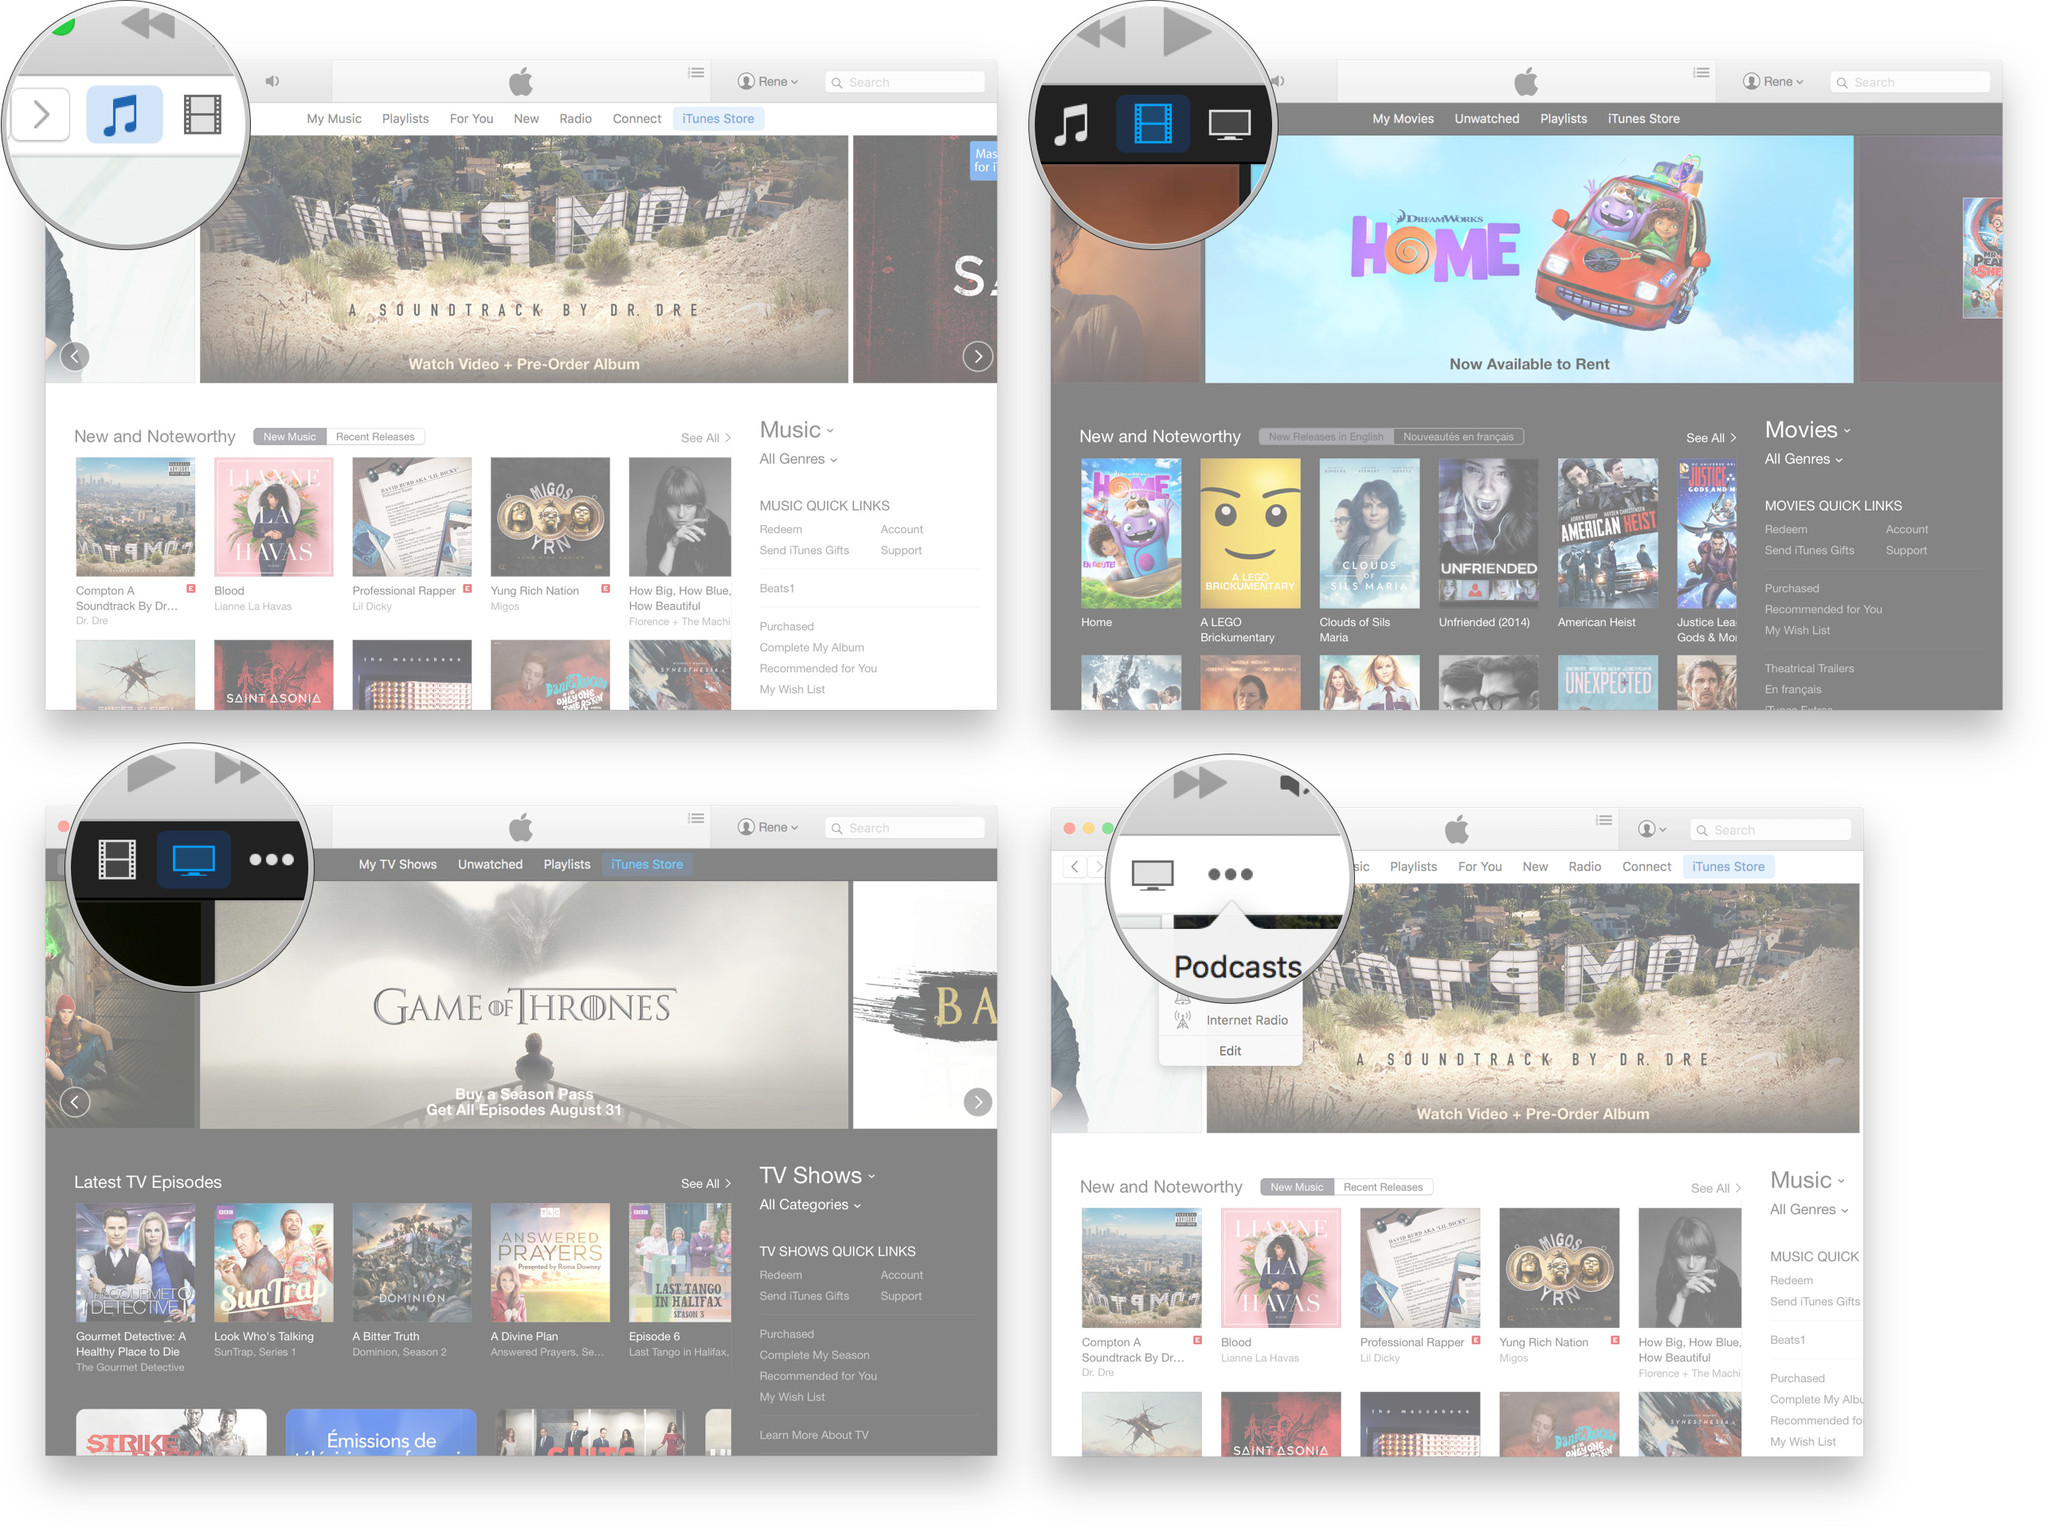
How to switch between media types (and devices!)
iTunes manages and makes available many—many!—different types of content. Front and center are Music, Movies, and TV Shows. There's also a More button (looks like •••) that provides access to Podcasts, iTunes U, Books, Apps, Tones, Internet Radio, and Shared Libraries.
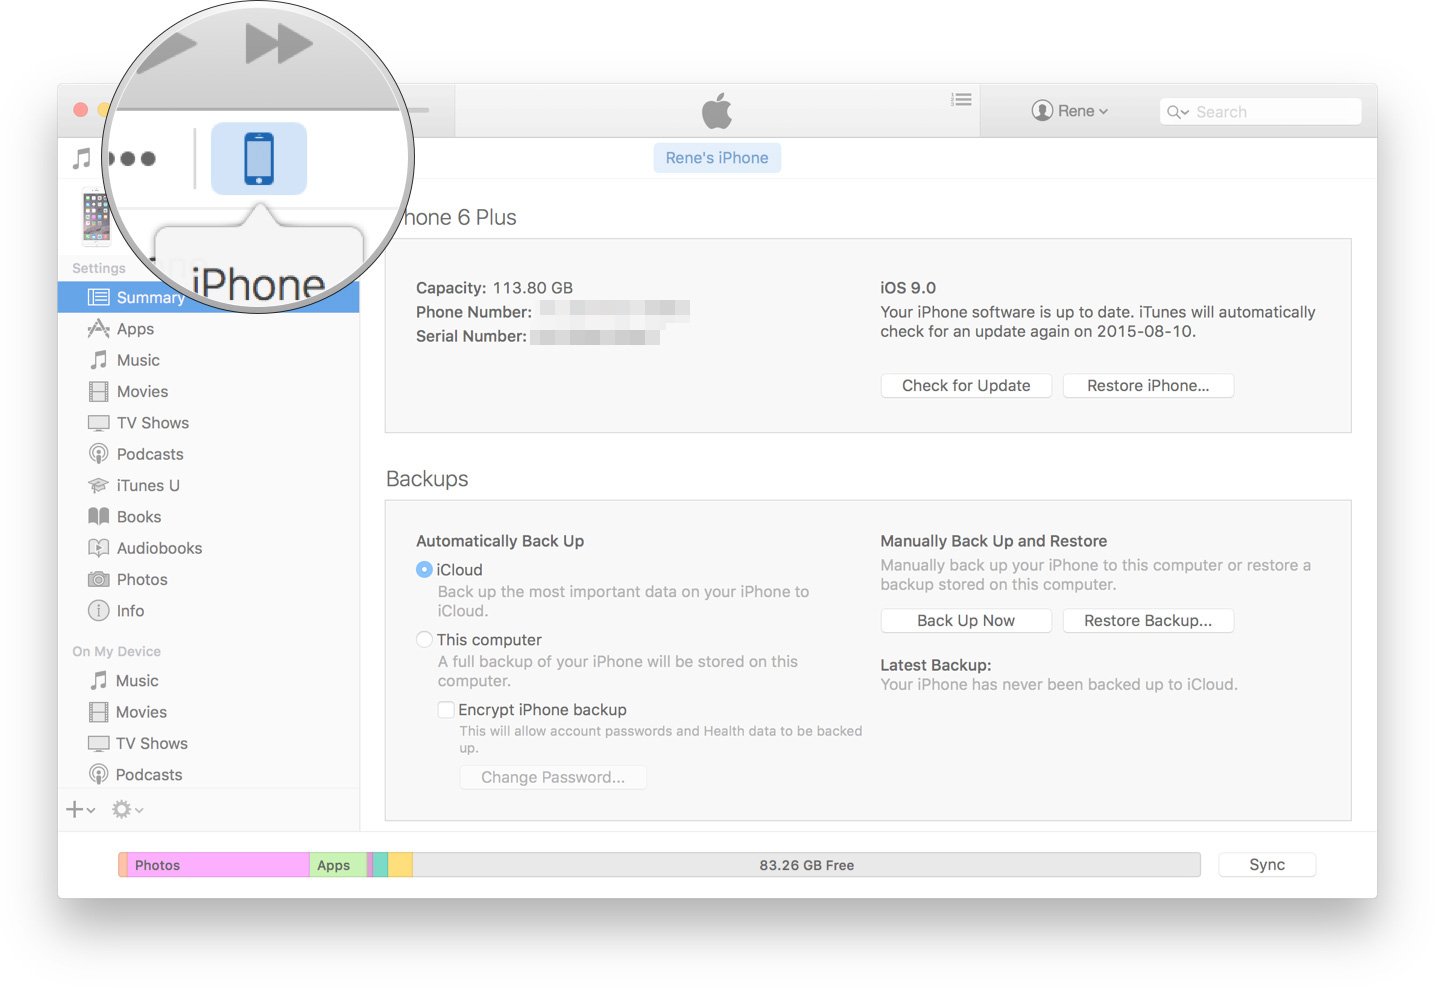
If you plug an iPhone, iPod touch, or iPad into your Mac over USB, a Device tab will appear.
You can edit all the tabs at any time so that iTunes only displays the ones that matter to you.
- Click on the More button (looks like •••).
- Click on Edit at the bottom.
- Check all media types you want to have appear in the tabs.
- Uncheck all media types you don't want to have appear in the tabs.
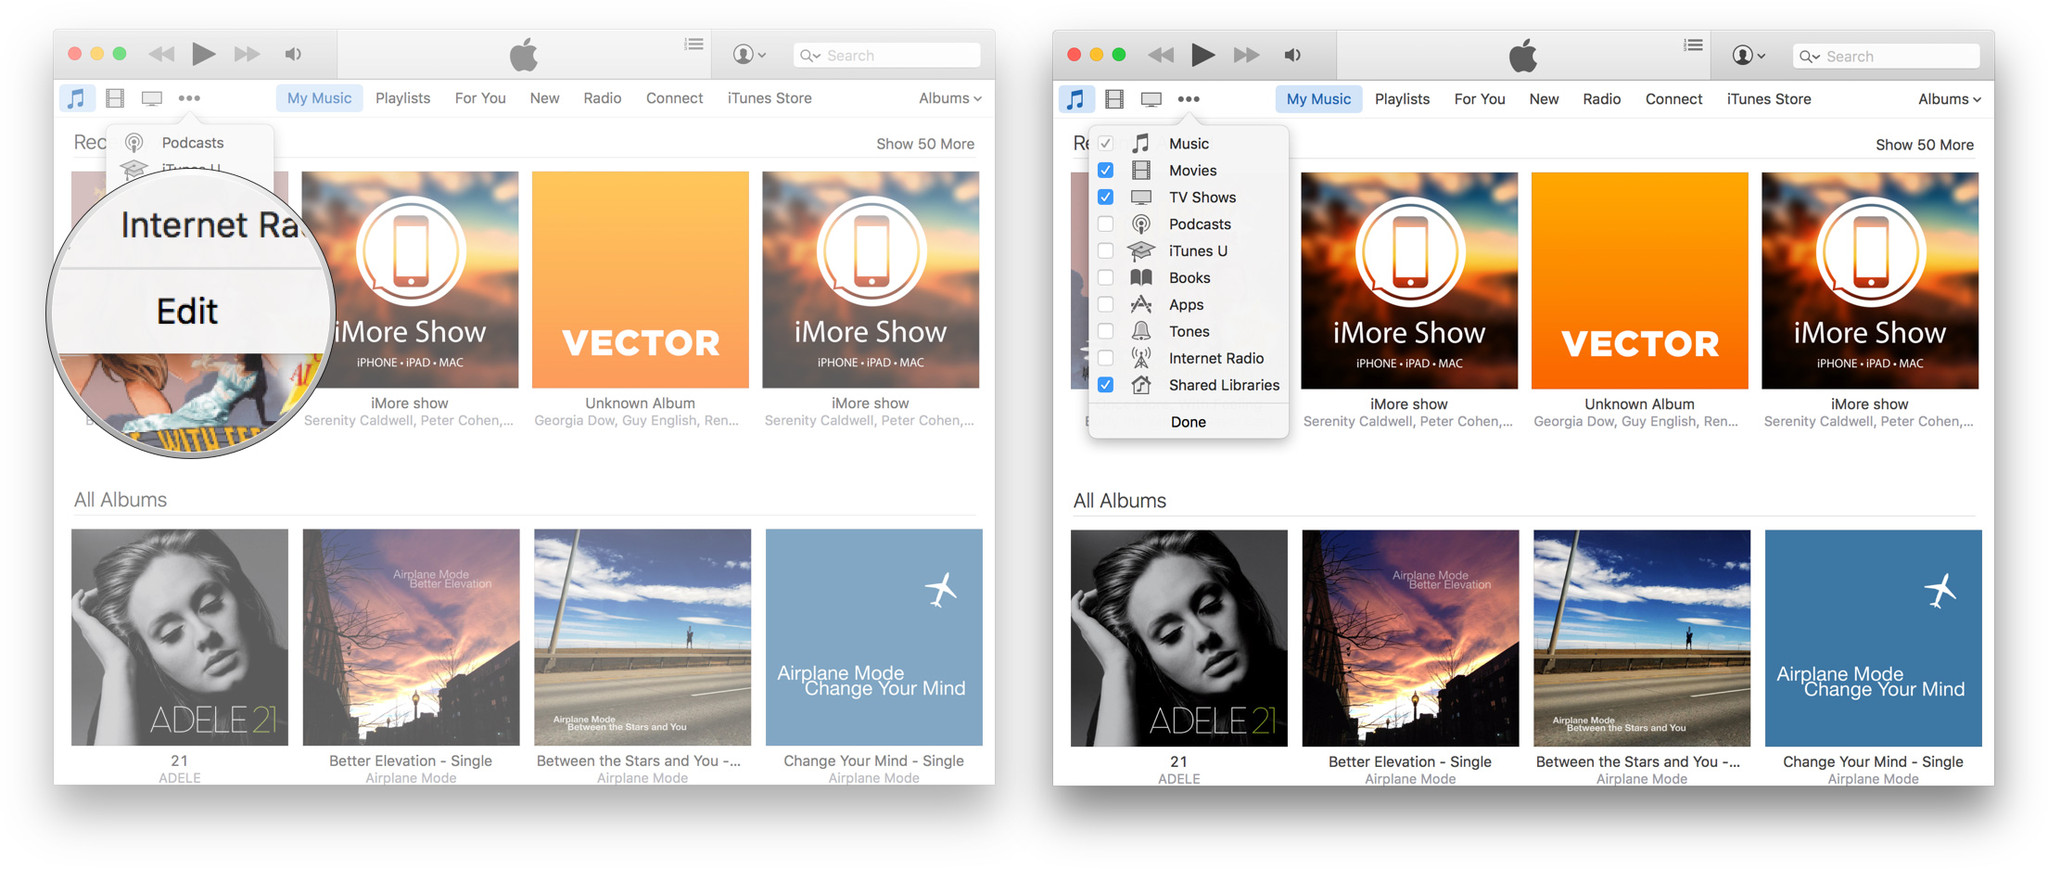
So, if you don't want TV Shows to show up front and center, and would rather relegate it to the More button, uncheck it. If you want Podcasts to show up, check it.
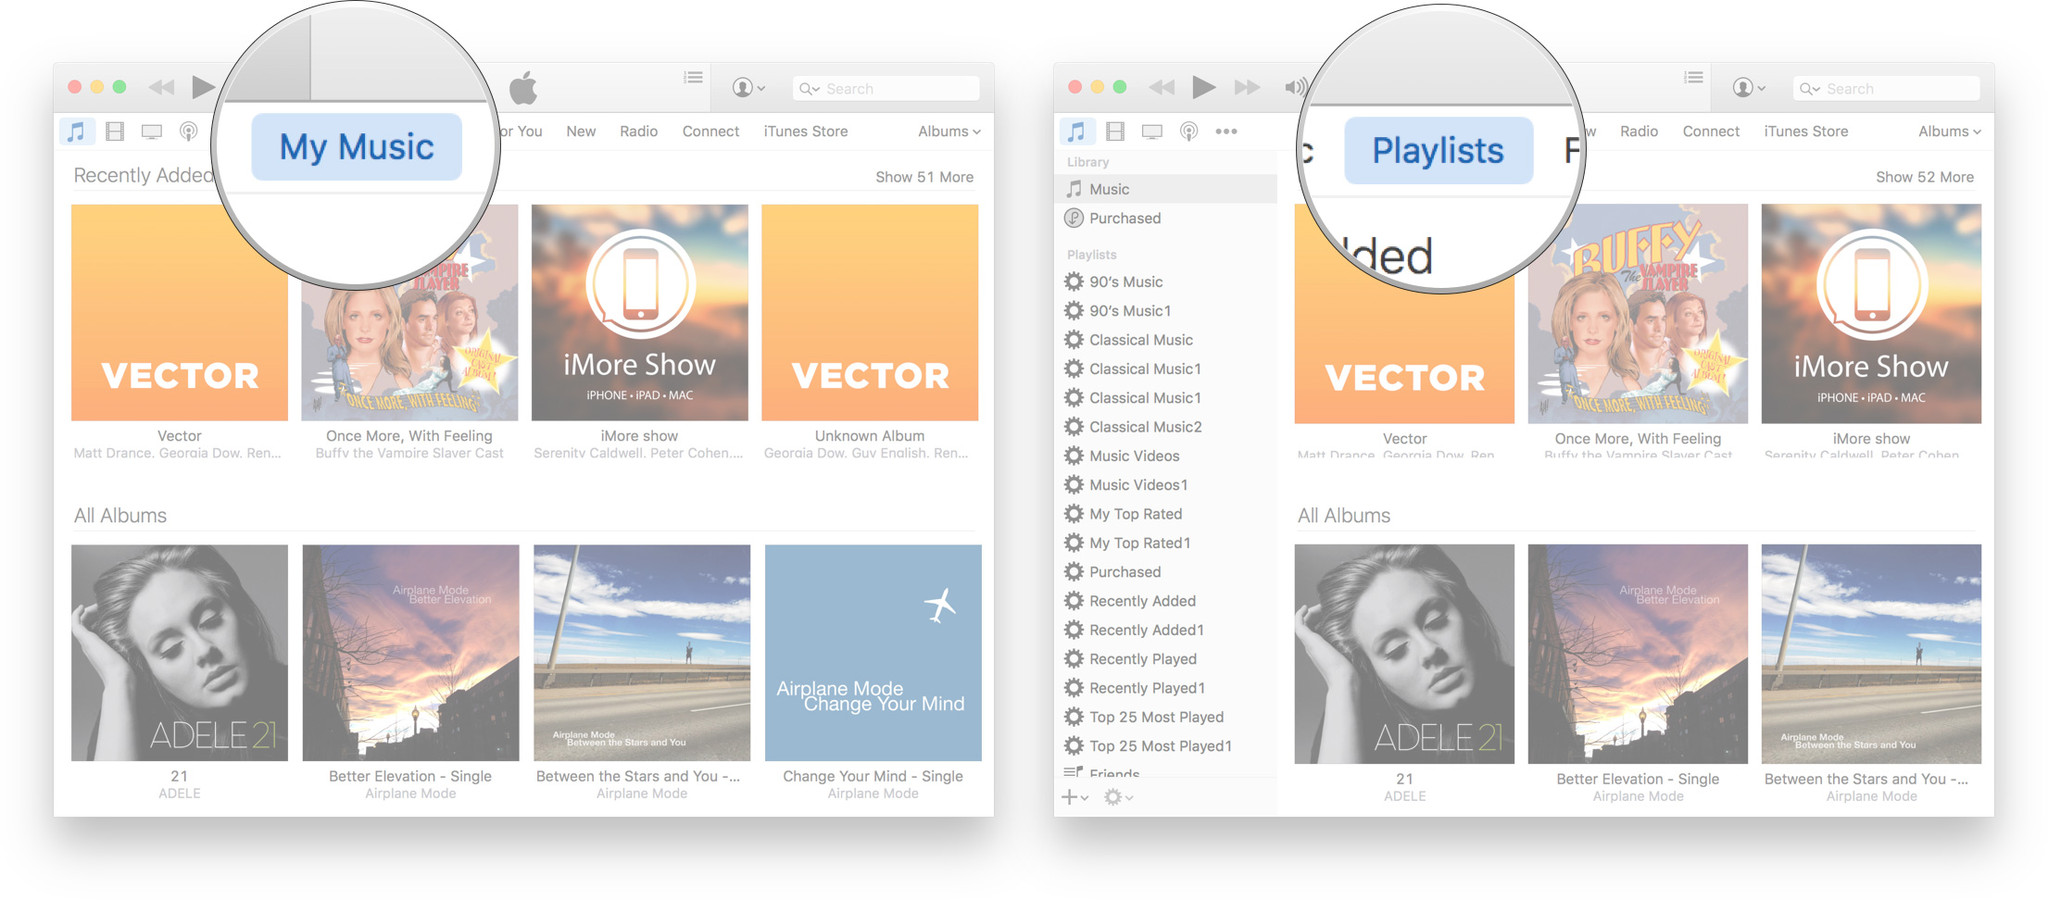
How to navigate your music
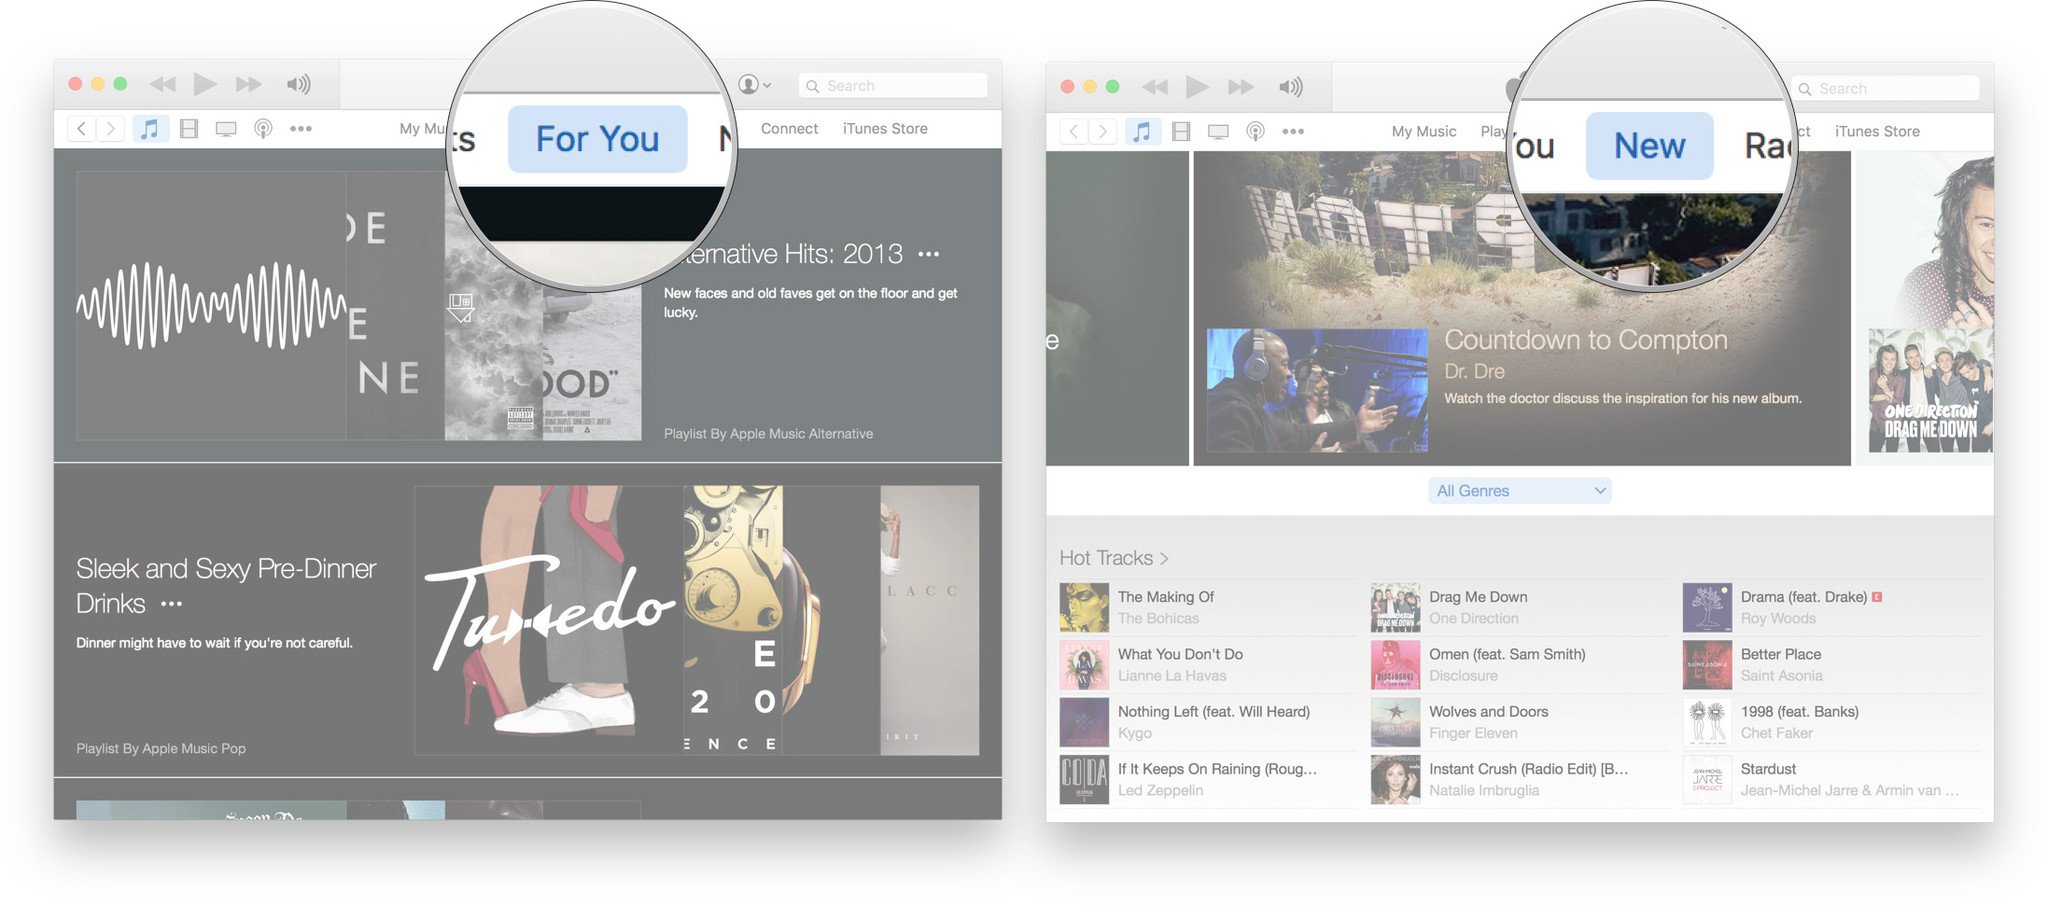
iTunes provides several different options for viewing music, including your personal library, recommendations, radio, social content, store content, and more. Some options require an Apple Music subscription, but not all.
- My Music: All the music you've bought from the iTunes Store, synced with iTunes Match, ripped from CD, or added from Apple Music.
- Playlists: As the name suggests, all the automatic playlists iTunes has created for you, and all the playlists you've built for yourself.
- For you: Recommendations chosen especially for you by Apple Music, its editors, contributors, and curators.
- New: The latest tracks from the iTunes Store and Apple Music.
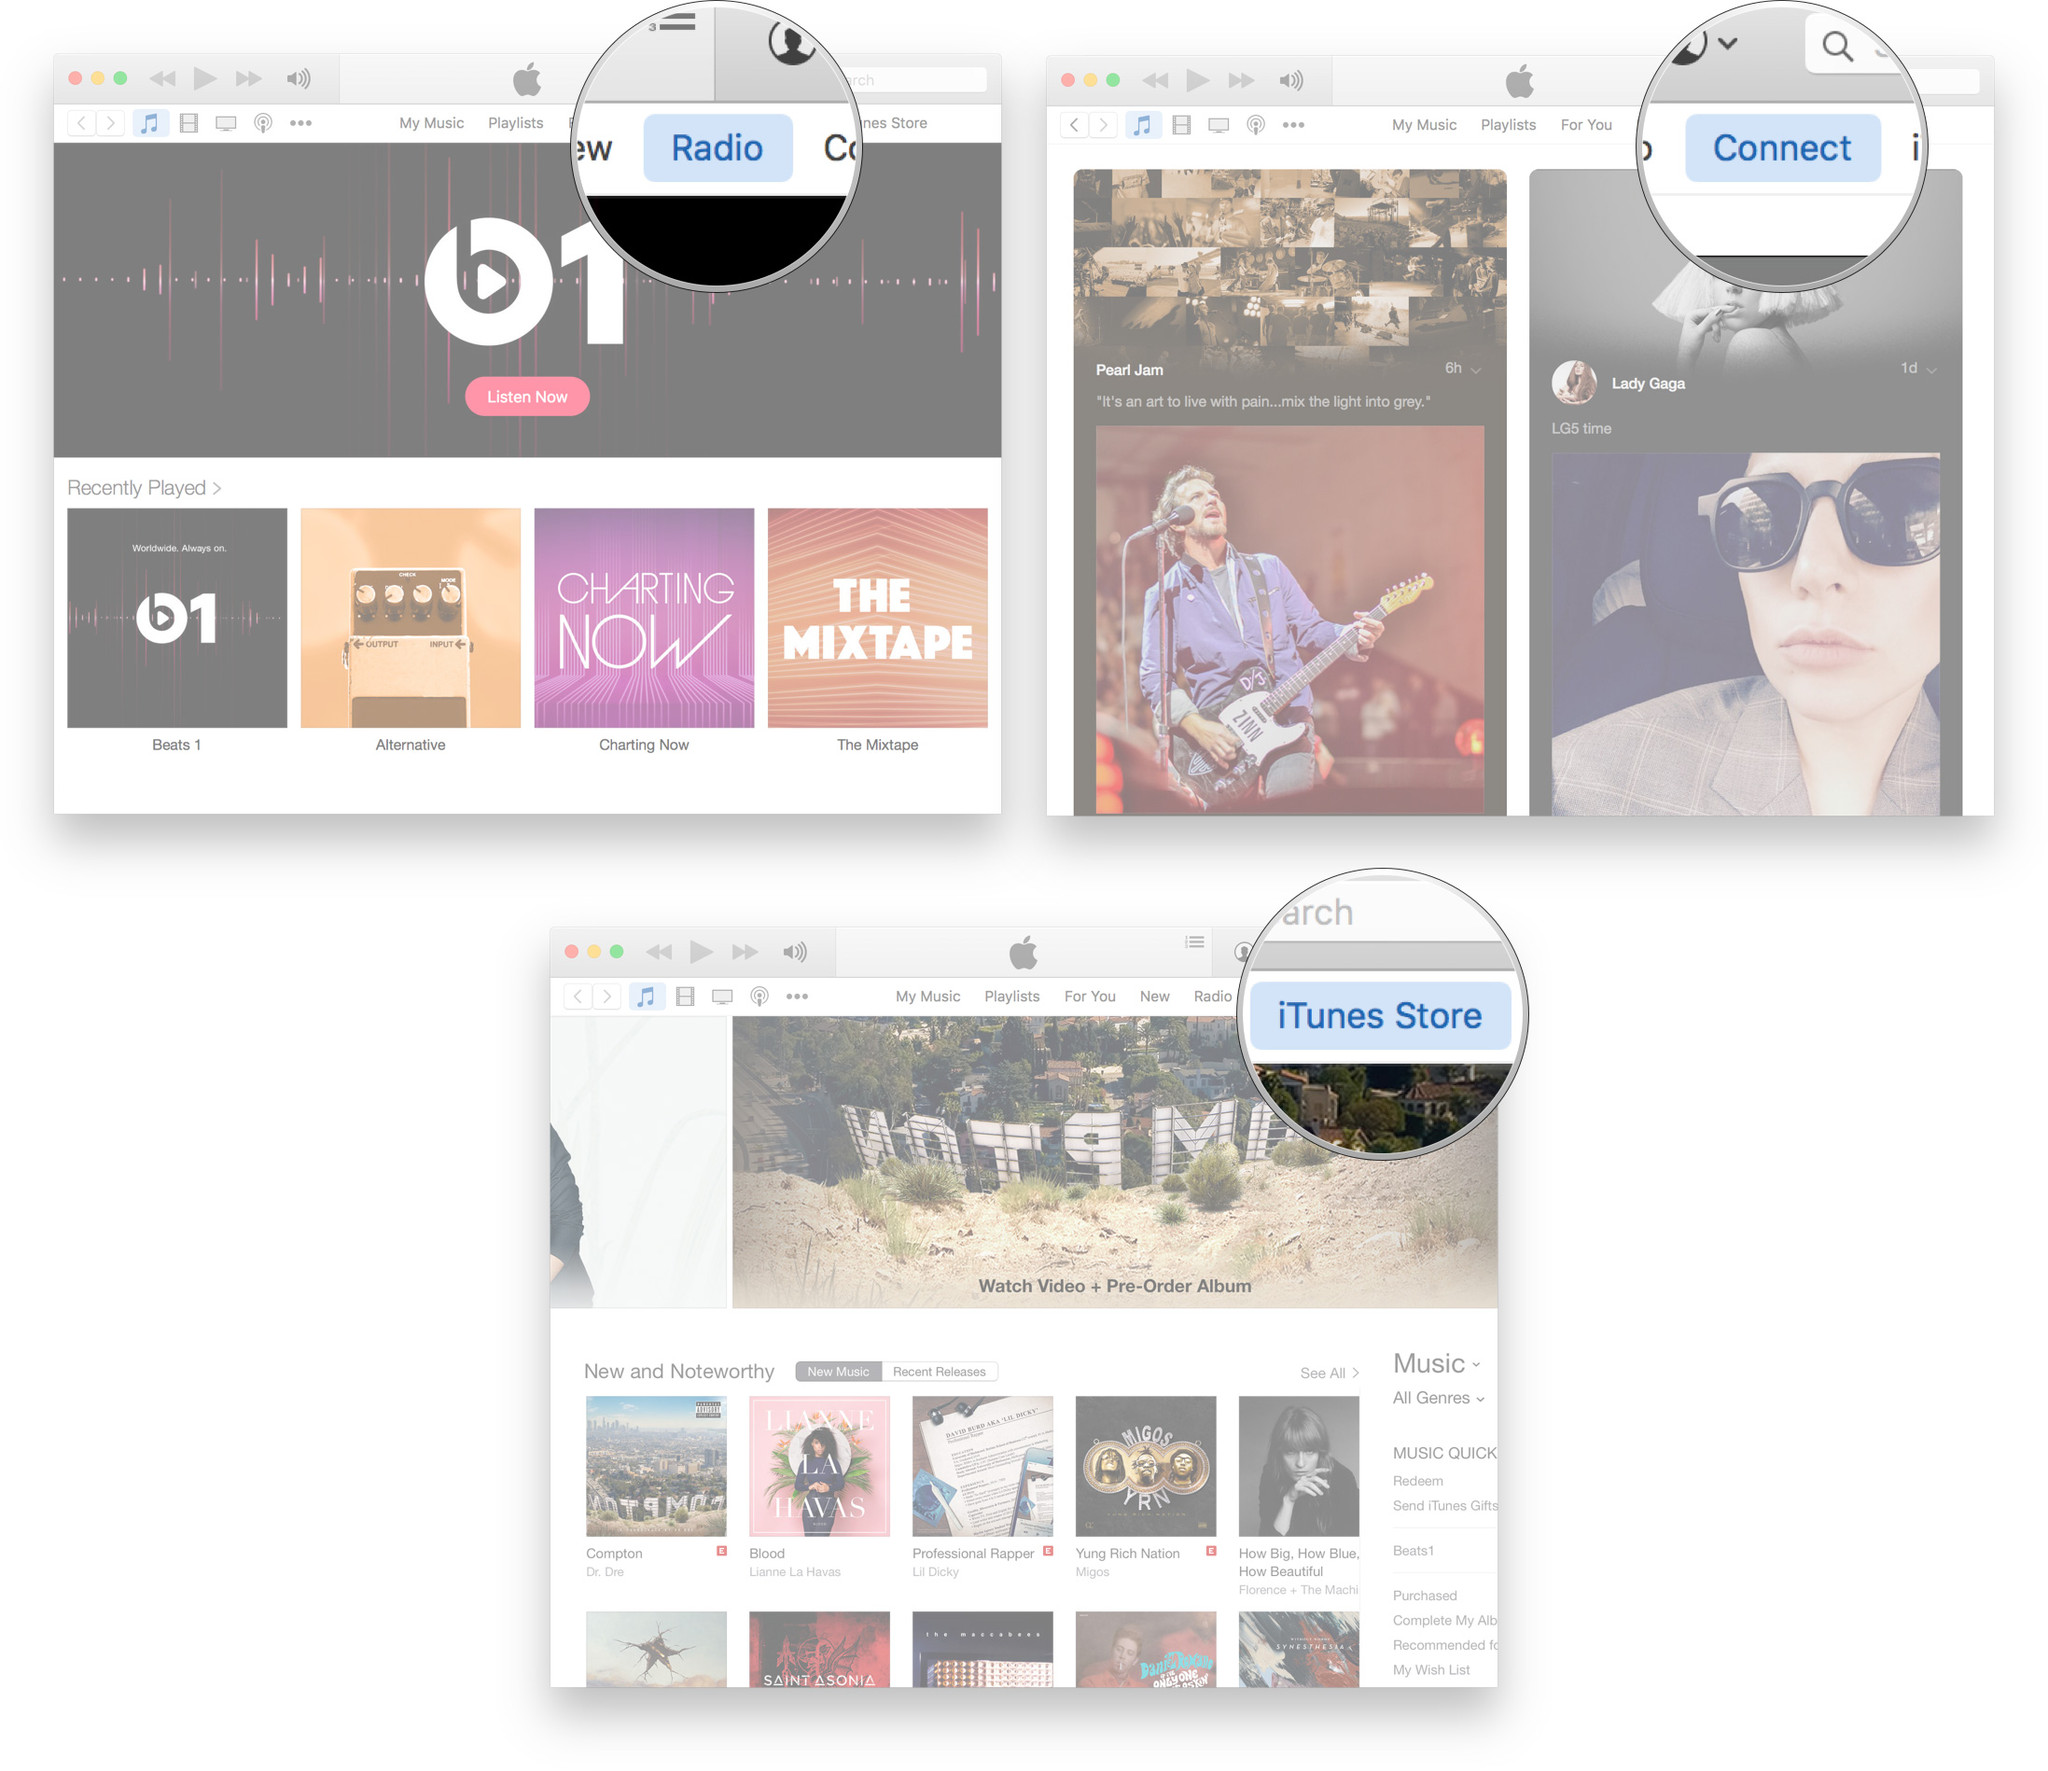
- Radio: Beats 1, Apple's always on, worldwide radio station, and other featured stations.
- Connect: The social network for Apple Music where artists can share lyrics, rough cuts, videos, and more.
- iTunes Store: The classic Apple online music purchasing experience
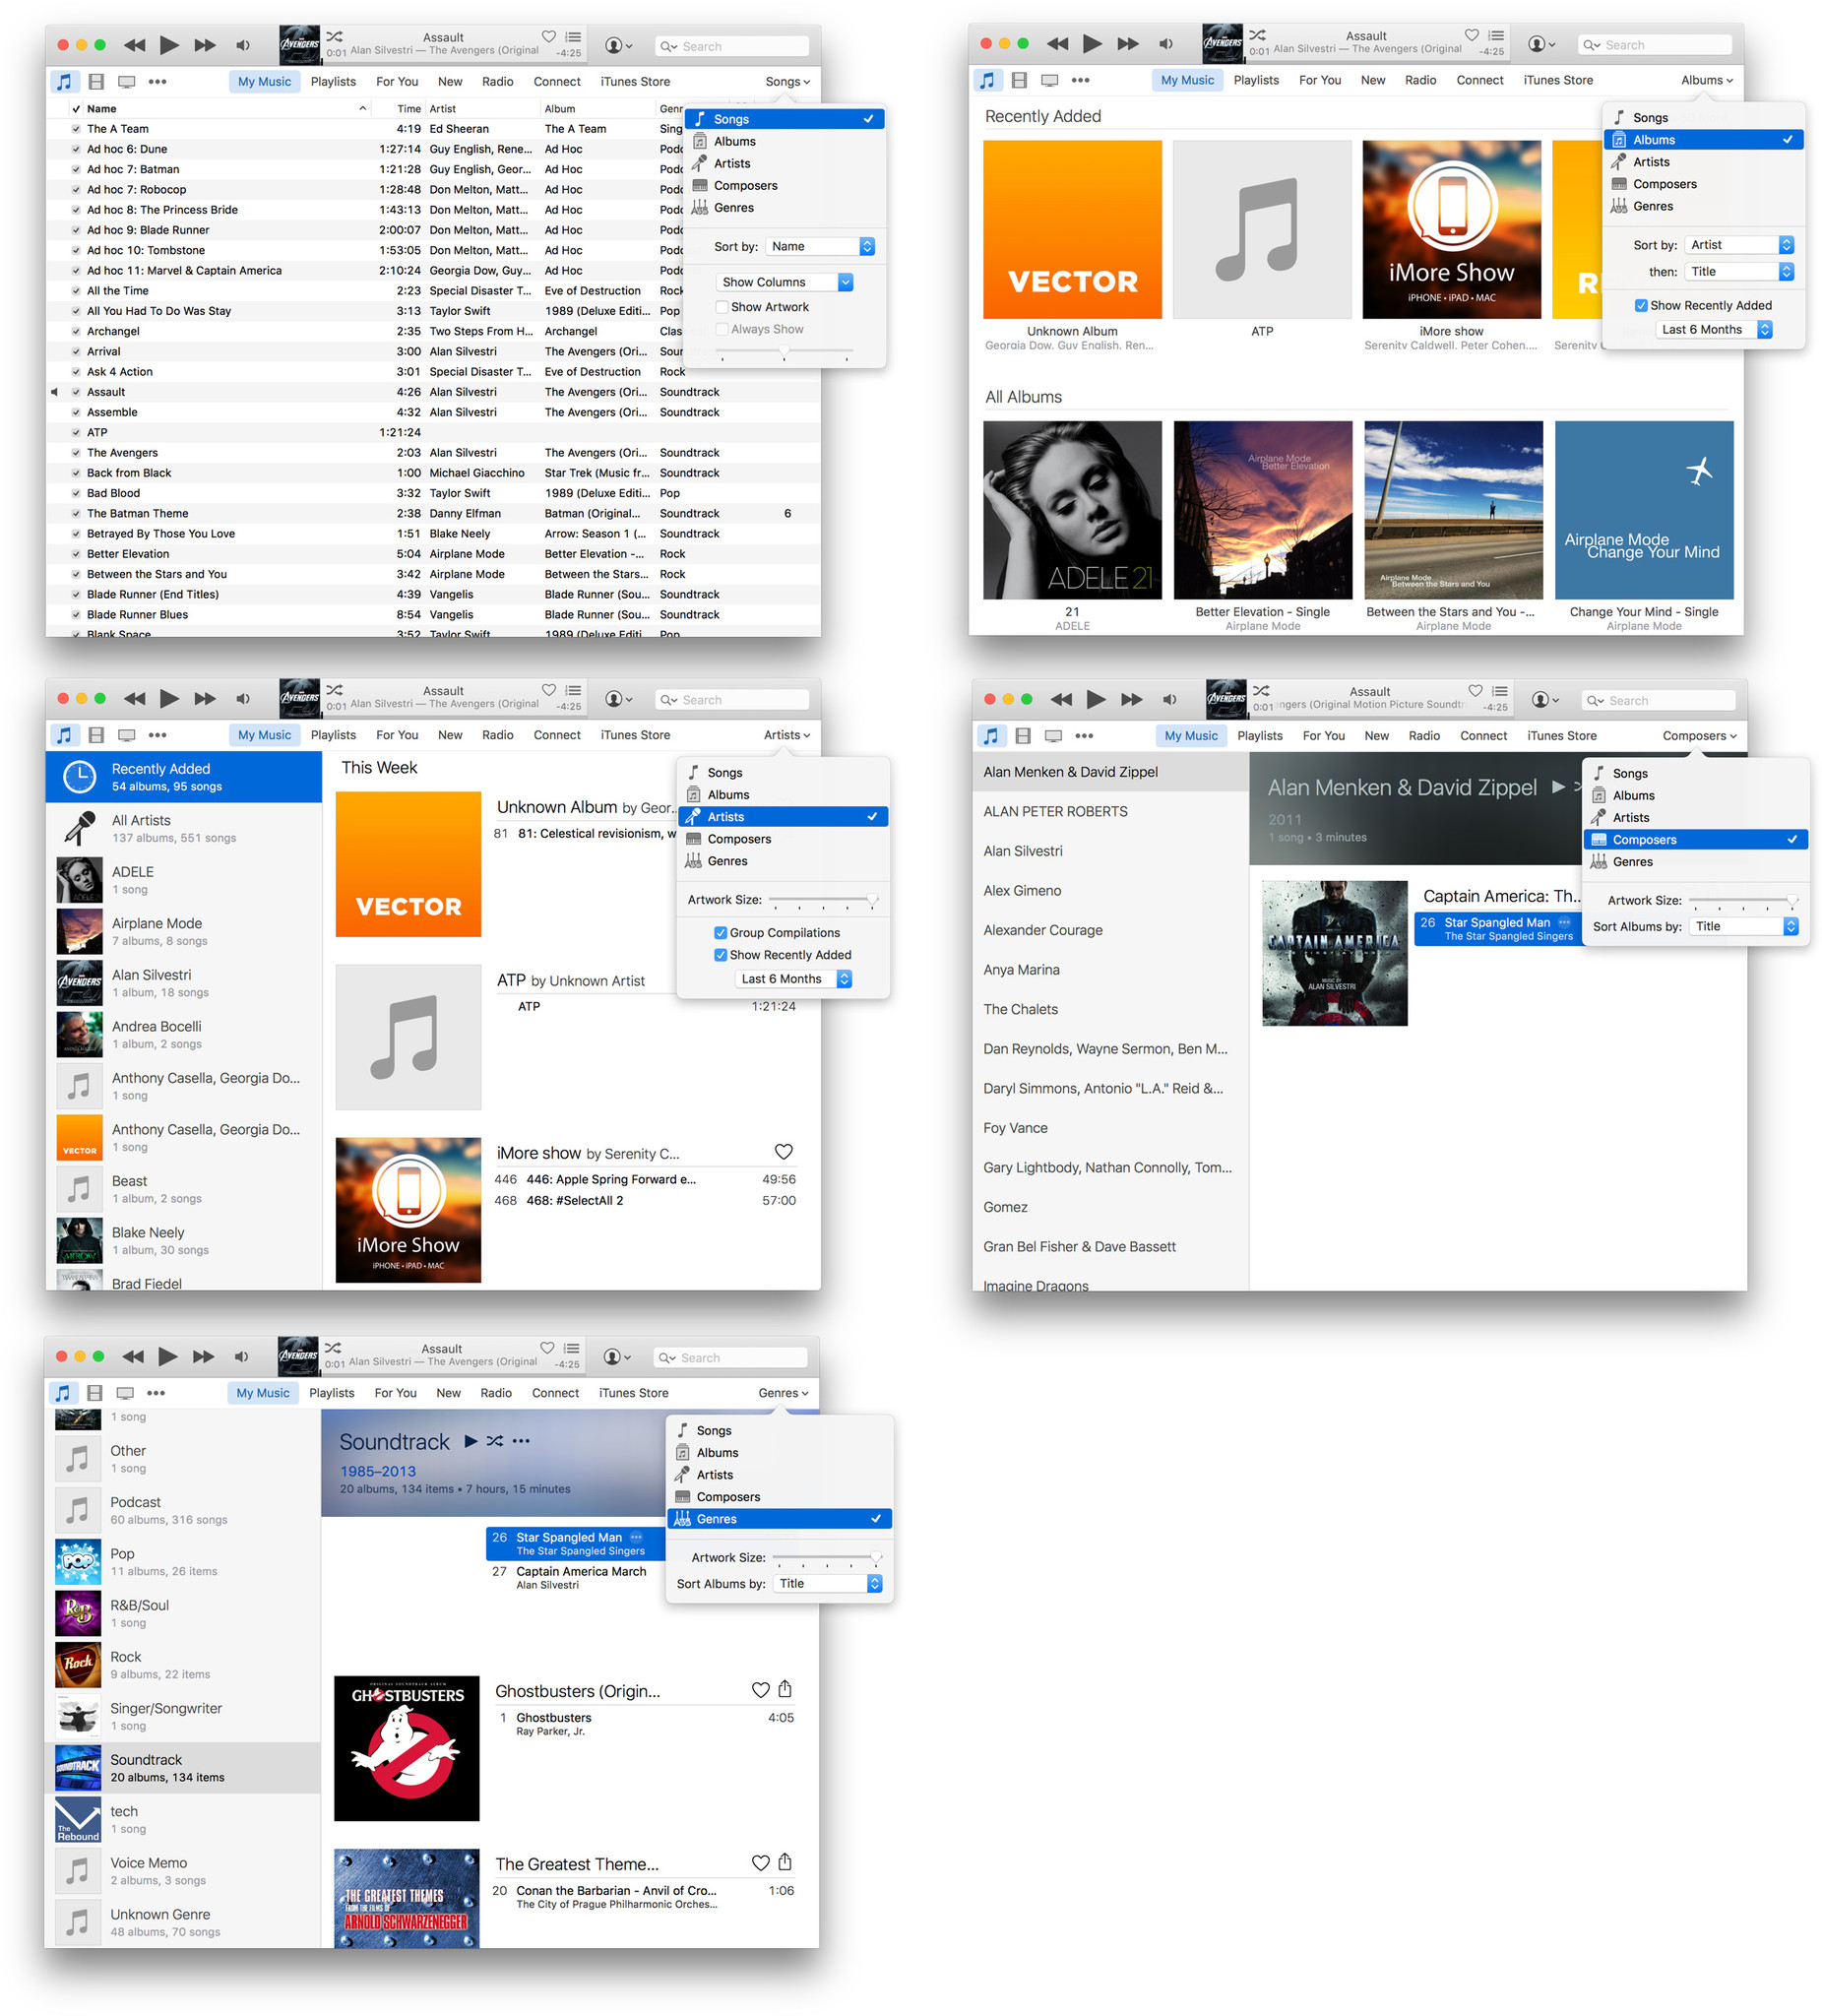
How to sort your music
There are also several different ways you can sort your music, including by song, by album, by genre, and more. You can choose primary, secondary, and in some cases even tertiary sort options. You don't have to use them all, but if you're particular, you can make it just exactly the way you like it.
How to add Apple Music to your personal library
While Apple Music is a streaming service that lets you play whatever you want from the catalog whenever you want, if there's something you like playing especially often you can "add" it to your My Music library. Think of it like a bookmark—it makes it easy to go back to any time you want.
You can "add" Apple Music from anywhere, including the For You, New, or Connect tabs, and even the Now Playing control.
- Go to the Apple Music song, album, or playlist you want to add.
- Hover your pointer over it to reveal the More button (•••).
- Click on the More button (•••).
- Click on Add to my Music.

How to download Apple Music to your Mac for offline play
If you're going to be offline for a while and don't want to lose access to your favorite Apple Music, you can download it—essentially cache it—to your Mac so you can keep playing it locally. Because you're not actually buying the music, it's not yours to keep, but you can keep it downloaded for as long as you're subscribed to Apple Music.
- Add the Apple Music song, album, or playlist to My Music (see above).
- Go to the Apple Music song, album, or playlist in My Music.
- Click on the iCloud icon to the right—or bottom right, depending on the view.

How to remove Apple Music from your library
You can remove Apple Music, including the songs, albums, and playlists you've added and the ones you've downloaded, the same way you remove any other music from your library—by deleting it. And yes, that means you have to be extremely careful you don't delete non-Apple Music the same way.
- Select the songs, albums, or playlists you want to delete.
- Hit the Delete key on your keyboard or go to the Edit menu and select Delete.
- Click Delete Items to confirm.

 Click on The Image & Start Earning !


